Before you start
Windows, your installed game, its rendering API and the official ReShade setup tool.
Downloads for this guide
Choose the files your setup needs. Paid packages require access through their author.
ReShade: Standard / full add-on support
Choose Standard for ordinary effects. Select full add-on support for RenoDX or a package that requires add-ons. Both builds are available in the official download section.
DigitalDreams presets and shaders
Open the download post for your game. Read its included dependency list before installing.
Locate the game and keep a rollback copy
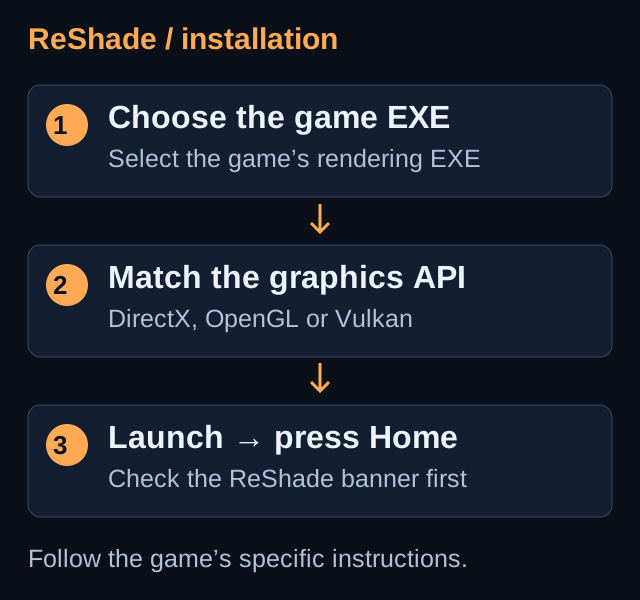
Close the game. Open its installation folder through your game library or launcher. A desktop shortcut may start a separate launcher; the rendering executable can be inside bin\x64 or Binaries\Win64.
If you already have a graphics mod installed, copy its ReShade configuration and presets into a backup folder outside the game directory. Keep a note of which files belonged to that setup before changing them.
Download the right build
Get the installer from reshade.me. Use the standard build for ordinary effects, or full add-on support when your shader or RenoDX package requires add-ons. Follow your game’s mod instructions for compatibility.
Run the setup EXE with the game closed. If the game is in a protected folder and setup cannot write there, follow the Windows file-permission guide below. Do not redirect installation into your Downloads folder; the selected game EXE determines the location.
Select the actual game executable
Run setup and select the executable that renders the game. Use Browse if it is missing from the list. A launcher may point to a different EXE; check the game’s own installation instructions.
In setup, click Browse if necessary, select the real game EXE and check the full path before continuing. Some games provide separate DX11 and DX12 executables. Target the one you actually launch.
Choose the rendering API
Select the API your game uses: DirectX, OpenGL or Vulkan. Confirm it in the game settings or documentation rather than guessing.
If the game allows switching between APIs, decide which mode you will use before installing. Special wrappers and other injectors can need their own instructions; use the preset author’s directions for those setups.
Install your effects
Select the shader packages required by your preset. If you already have a preset, use Browse to provide its .ini during setup. Finish the installer.
Select only the packages your preset needs. Custom or paid shaders may require a separate author download; selecting an INI does not guarantee every dependency is available through setup. Continue with our shader and preset installation guide for those files.
Launch and verify
Start the game. Look for the ReShade banner, then press Home (or the key shown by the banner). Follow the overlay tutorial. Continue with the shader and preset guide below.
Choose the preset using Home’s preset bar and check that its expected effects are enabled. In Settings, configure an effect toggle key, then compare the same scene with effects enabled and disabled.
Save, relaunch and know how to uninstall
Save changes deliberately using the preset controls. Keep the original download and a separate copy for personal tweaks. Relaunch the game once to confirm the overlay and your selected preset return.
If the installation needs to be removed, run the official setup again for the same EXE and rendering API, then choose its uninstall option. Preserve your preset backup. Do not delete unrelated game DLLs by guessing filenames.
Troubleshooting
No banner or overlay?
Run setup again and verify the executable and API. The banner shows your configured overlay key; on some laptops Home requires Fn.
Can I use it in an online game?
Check the game and anti-cheat rules before installing. Full add-on support is a separate build; permission and compatibility depend on the game.
GO TO THE SOURCE
Sources & reference
Use the authors’ current instructions for your game and package.